

This pink dress, which is over seven years old, has languished in the corner of my closet for the last few years. It had become a little too short, and didn't fit very well. Furthermore, it was sleeveless, which isn't my preferred style and meant that I was always searching for a cardigan to go over it.

The fabric, however, was beautiful, and enticed me to a challenge. Could I make the dress over, resulting in a more modest, better fitting, yet still gorgeous outfit?
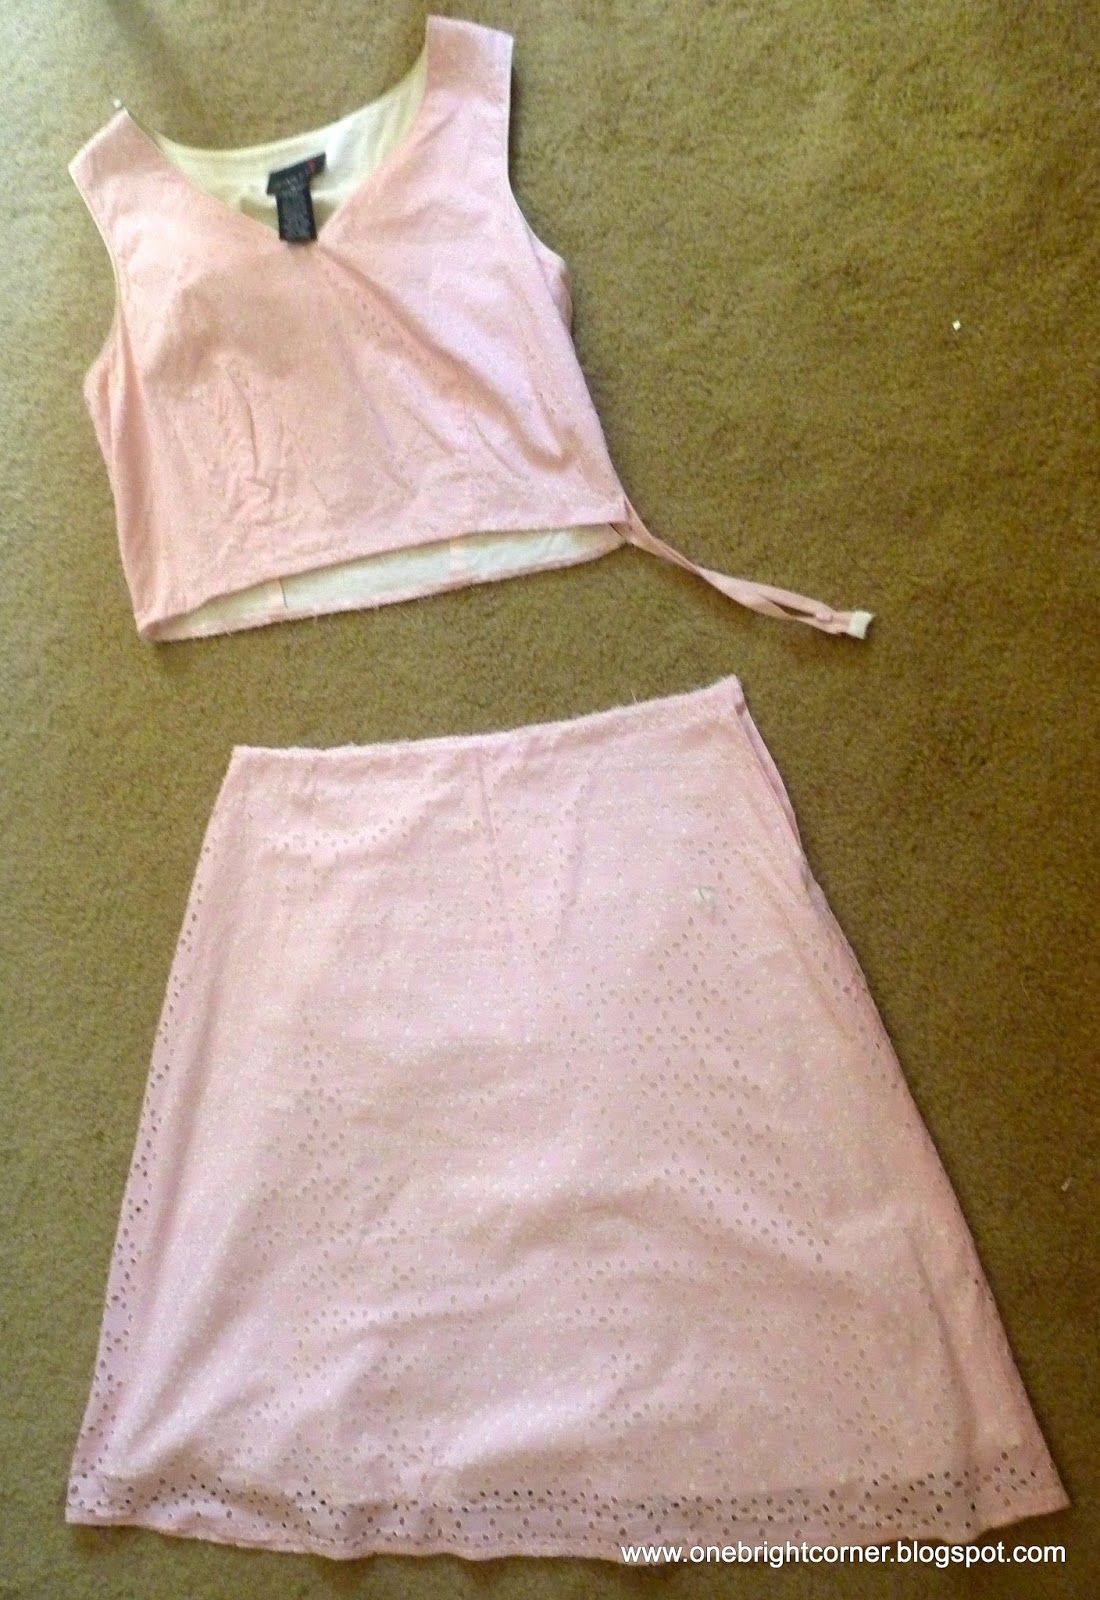
Thankfully, I had a secret weapon to help me out in my challenge: Mikaela had an identical dress (one of the many perks of having an identical twin sister!). Hers, however, had been languishing in her closet even longer because it was several sizes too big for her. With her permission and only a slight bit of trepidation, I ripped apart her dress and got busy!


Every challenge needs its challenging moments. In the top photo, you can see my length addition sewed perfectly onto my dress. Perfect, except that I later realized that the trim I wanted to add needed to be sewn into the seam! So I ripped that whole seam out, and prepared to make the trim, which would hide the addition to the dress and serve as a stylish element as well.
I wanted the trim to be an exact match for the trim found on the waist of the dress, but wasn't sure where I could get that same white fabric. Amazingly, I didn't have to look any farther than the lining of the dress--perfect match!
I simply cut several strips of the white lining on the bias, sewed them together into one long strip, folded them in half lengthwise, and sewed a quick seam to hold it in place. Next, I pinned the trim to the bottom edge of my dress, and then the addition (right sides together) on top of that. One more seam, and the skirt was done!


I also had to add an addition to the lining, since the eyelet fabric addition would be see-through without it. So I cut more fabric from Mikaela's dress lining and followed the same steps as above to add the required length.

Next up: I decided to tackle cap sleeves, without a pattern! First, I googled. Second, I had to sew up the center seams of the straps to adjust the bodice fit. Then, I measured around my upper arm, and cut two rectangles of fabric about an inch shorter than that measurement (since I didn't need the sleeve to go all the way around). I made my sleeves about 4 inches wide, but they could be even wider.
In the middle photo above, I sewed the eyelet to the lining wrong sides together, turned it right-side out, top-stitched, and had a beautiful finished sleeve edge! I finished the other edges by zig-zagging them, then trimming them.

Next, I folded the sleeve in half and held it up to the armhole of the dress. I traced that curve along the sleeve, and cut it out to end up with the half-moon shaped piece in the upper right.
I then gathered the zig-zagged edges, pinned them into the armhole, and sewed them up (and tore out the weird gathers and tucks that I always manage to sew over).

Finally, I wanted to create a few flowers to add the last touch of elegance to the dress. I decided to try out a new technique I had seen on Pinterest, which turned out quite wonderfully! You simply trace a disc on a piece of fabric, then cut the circle in a spiral shape. I found that rolling the first few inches to form a loose bud, then randomly gathering the rest of the length to form petals worked beautifully!

A cluster of posies adorns the waist.

My finished pink dress! Challenge met!

Even though that trim required seam-ripping, it was worth it!

The dress made its debut only a few days after completion at my dear cousin's wedding. Here I'm on the left getting in on the bouquet toss!

Next week, Mikaela will have more from the wedding to share with you all! But for now, although my room is still strewn with pins and pink threads, I love my "new" dress and know one thing for sure: it will not be a closet languisher in the future!

oh, fun! I'm always pleased when a make-over turns out well, and yours surely did! :)
ReplyDeleteThat's amazing Lauren:) and it turned out to be so beautiful too! Your creativity simply leaves me in the dust:)
ReplyDeleteBeautiful job, Lauren! How exciting that must have been to experiment and actually end up with something beautiful to wear!! I love the way it looks on you. Gorgeous!
ReplyDeleteBlessings!
~Emily
The moment I glanced at your dress hanging tight, waiting to attire you once you finished helping so many others prior to the wedding, I thought, "What a perfectly-pink dress for this celebration." I wished I had commented aloud as to hear you had created it. Well done Lauren! By the way, reading this blog was like trying to understand a lesson in tryg. I do not speak seamstress (seams give me stress). Love and admiration, Aunt Hiedie
ReplyDeleteWow Lauren... you did an amazing job! :)
ReplyDeleteThe dress turned out beautifully, Lauren! Well done!
ReplyDeleteYes, I agree with Ruthie its beautiful! What a great way to be thrifty Lauren by using what you already had to make a "new to you" dress. God bless!
ReplyDelete